Taking a photo of a beautiful drink in a dimly lit bar can be frustrating. The picture often turns out dark, blurry, and unappealing. You want to capture fotos reales de tragos en bares – authentic, vibrant photos that do the drink justice.
This guide will show you how to take professional-looking drink photos using any camera, even just a smartphone. It’s not about creating fake, overly-staged shots. Understanding a few key principles of light, composition, and editing is all it takes to transform your photos.
Mastering the Bar Environment: Finding the Best Light
The biggest challenge in any bar? Low and inconsistent lighting. It’s like trying to read a menu with a candle that’s about to go out.
Avoid using a harsh, direct on-camera flash at all costs. It’s like shining a spotlight on your subject and saying, “Hey, look how unflattering I can be!”
Instead, find and use ‘good’ ambient light. Sitting near a window before sunset, under a decorative lamp, or in a well-lit part of the bar back can work wonders. Think of it as finding the sweet spot where the light is just right—like Goldilocks, but for your photos.
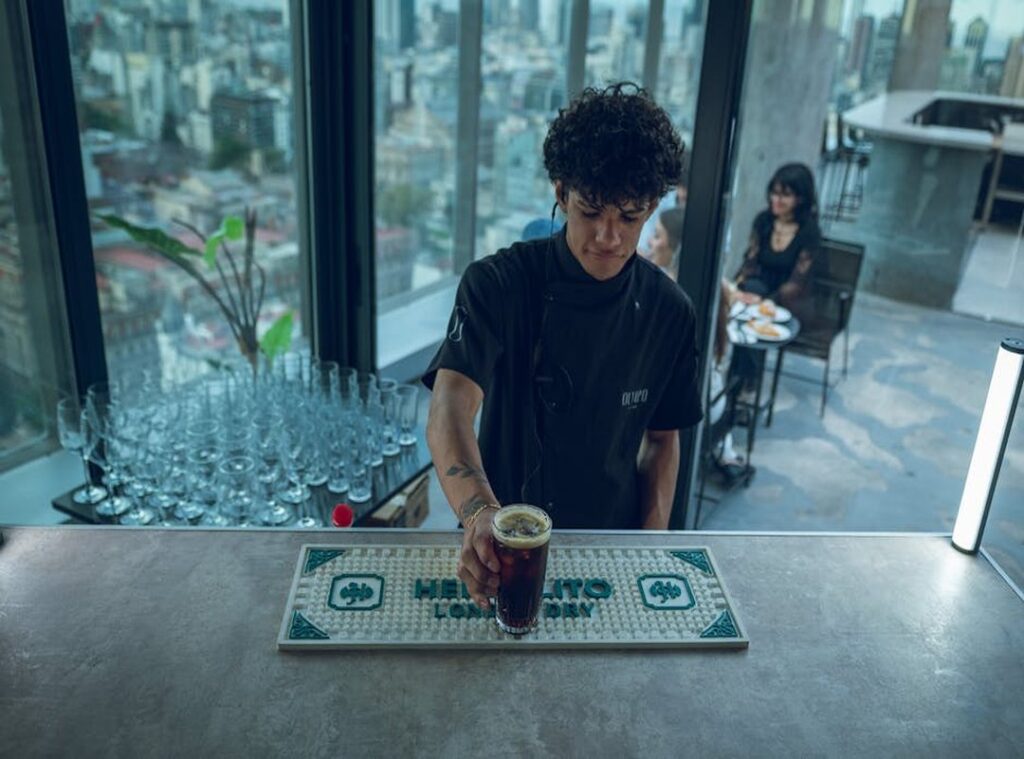
Positioning the drink relative to the light source is key. Side-lighting is often best for highlighting the texture and color of the liquid. It’s like giving your drink a little spotlight moment without the glare.
Reflections on glassware can be a nightmare. Shoot at a slight angle to the glass rather than straight-on to minimize unwanted glare. Trust me, no one wants to see a reflection of your phone in their cocktail.
And let’s talk about the background. Look for clean, non-distracting backgrounds. If that’s not possible, use a shallow depth of field (like Portrait Mode on a phone) to blur a busy scene.
It’s like putting on a pair of sunglasses to block out the chaos.
Remember, fotos reales de tragos en bares are all about capturing the vibe. So, take your time, experiment, and don’t be afraid to move around. After all, the best shots often come from the most unexpected angles.
Simple Gear for Stunning Shots (Your Phone is Enough)
Let me reassure you, a modern smartphone is more than capable of taking incredible drink photos. I used to think I needed a fancy camera, but I was wrong. Your phone can do wonders.
Tap to focus and adjust the exposure slider before taking the shot. It makes a huge difference. Trust me, I’ve taken plenty of underexposed and blurry shots before I learned this.
A small, portable LED light is an optional but game-changing tool. It adds a soft kiss of light that can transform your fotos reales de tragos en bares. I once tried to shoot in a dimly lit bar without any extra light.
The results were disappointing, to say the least.
For more manual control, try apps like Lightroom Mobile or Halide. They give you the power to tweak settings and get the perfect shot. I wish I had known about these apps earlier; it would have saved me a lot of frustration.
If you’re using a DSLR or mirrorless camera, a ‘fast’ prime lens, like a 50mm f/1.8, is ideal for low-light bar photography. I made the mistake of using a slower lens, and my photos came out grainy and dark. A fast lens lets in more light, making your shots crisp and clear. Zuyomernon
Don’t forget the utility of a simple white napkin or menu as a makeshift reflector. Bouncing light back into the shadows of the drink can make all the difference. I once used a coaster, and it worked surprisingly well.
Sometimes, the simplest solutions are the best.
Composition and Styning: Telling a Story with Your Drink
When it comes to capturing the perfect drink photo, composition is key. One of the most effective techniques is the ‘Rule of Thirds.’ Place the drink off-center, not in the middle. This creates a more dynamic and professional look.
Eye-level shots make you feel like you’re about to take a sip. A 45-degree angle shows both the glass and the surface. And a directly overhead shot works great for flat-lays with garnishes.
Styling is just as important. Use the existing elements to your advantage. A beautiful garnish, a branded coaster, or even the condensation on the glass can add that extra touch.
Including a human element makes the photo feel more real and alive. Try a hand reaching for the glass or a bartender in the blurred background. It adds a sense of movement and life to the image.
Act quickly, especially with cocktails that have foam or ice. You want to capture them at their freshest.
Take multiple shots from different angles and distances. This gives you options later. You never know which one will turn out best.
Fotos reales de tragos en bares are a great way to show the authentic, vibrant atmosphere. They tell a story and make the viewer feel like they’re right there with you.
The Final Touch: Editing for a Polished, Natural Look
Editing should enhance, not alter reality. The goal is to make the photo look as good as the drink did in person.
- Increase exposure/brightness to bring out the natural light.
- Lift shadows to reveal details that might be hidden.
- Boost vibrancy or saturation slightly to make colors pop.
Use a sharpening tool selectively. Focus on key details like the garnish, bubbles, or glass rim to make them look crisp.
Avoid heavy, generic filters. They can make the photo look fake and unnatural. Fotos reales de tragos en bares should look real, not like they came from a fairy tale.
Remember, the best edits are the ones you don’t notice.
Your Next Drink Deserves a Better Photo
Remember the core lessons: find the best light, compose the shot with intention, and make simple edits to enhance the final image. You now have the knowledge to stop taking disappointing bar photos and start capturing fotos reales de tragos en bares.
The next time you’re out, order a beautiful drink and put these simple tips into practice. Practice is key, and your photos will improve with every attempt.